Software Installation
Contents
Setting up your Raspberry Pi
- Raspberry Pi 4
- SD Card (32GB recommended)
- Raspberry Pi 4 power supply (USB-C, 5V, >=3A)
- Ethernet cable
Preparing the Pi’s SD card
From your desktop / laptop:
2. Download this version of Raspbian
Use this version so everyone is using the same version. Unzip and extract the file.
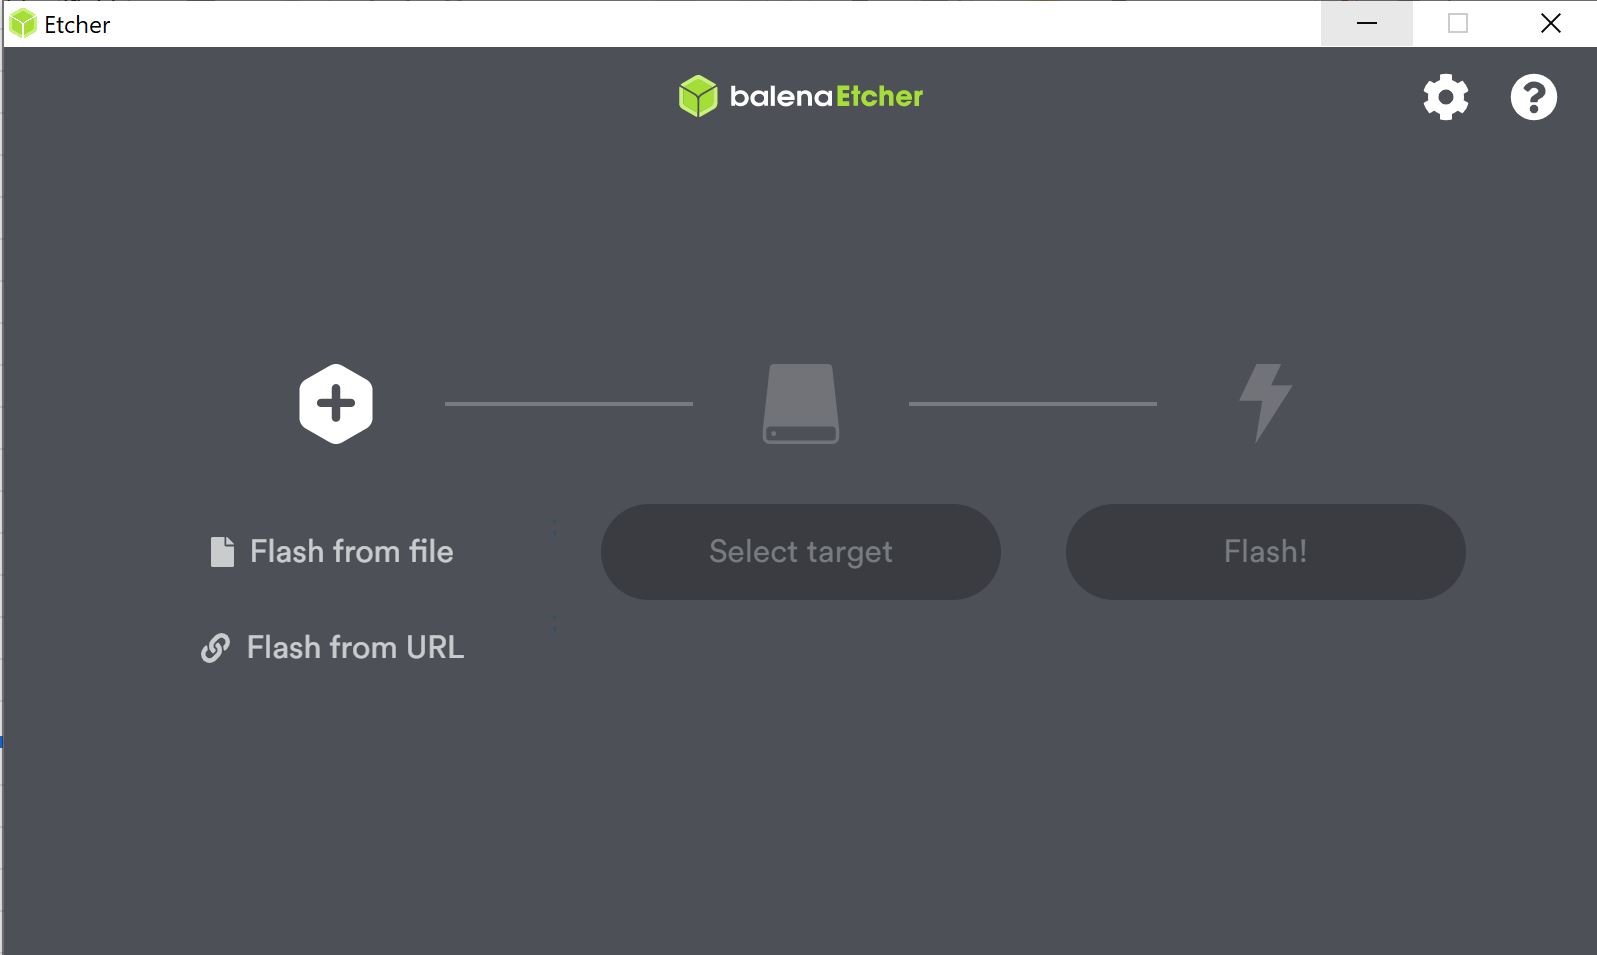
3. Use etcher to flash the card.
- If you are using the recommended etcher, this is the start-up menu. Select 2019-09-26-raspbian-buster-lite.img (file inside zip )and the SD card.
- Image of SD card being flashed.
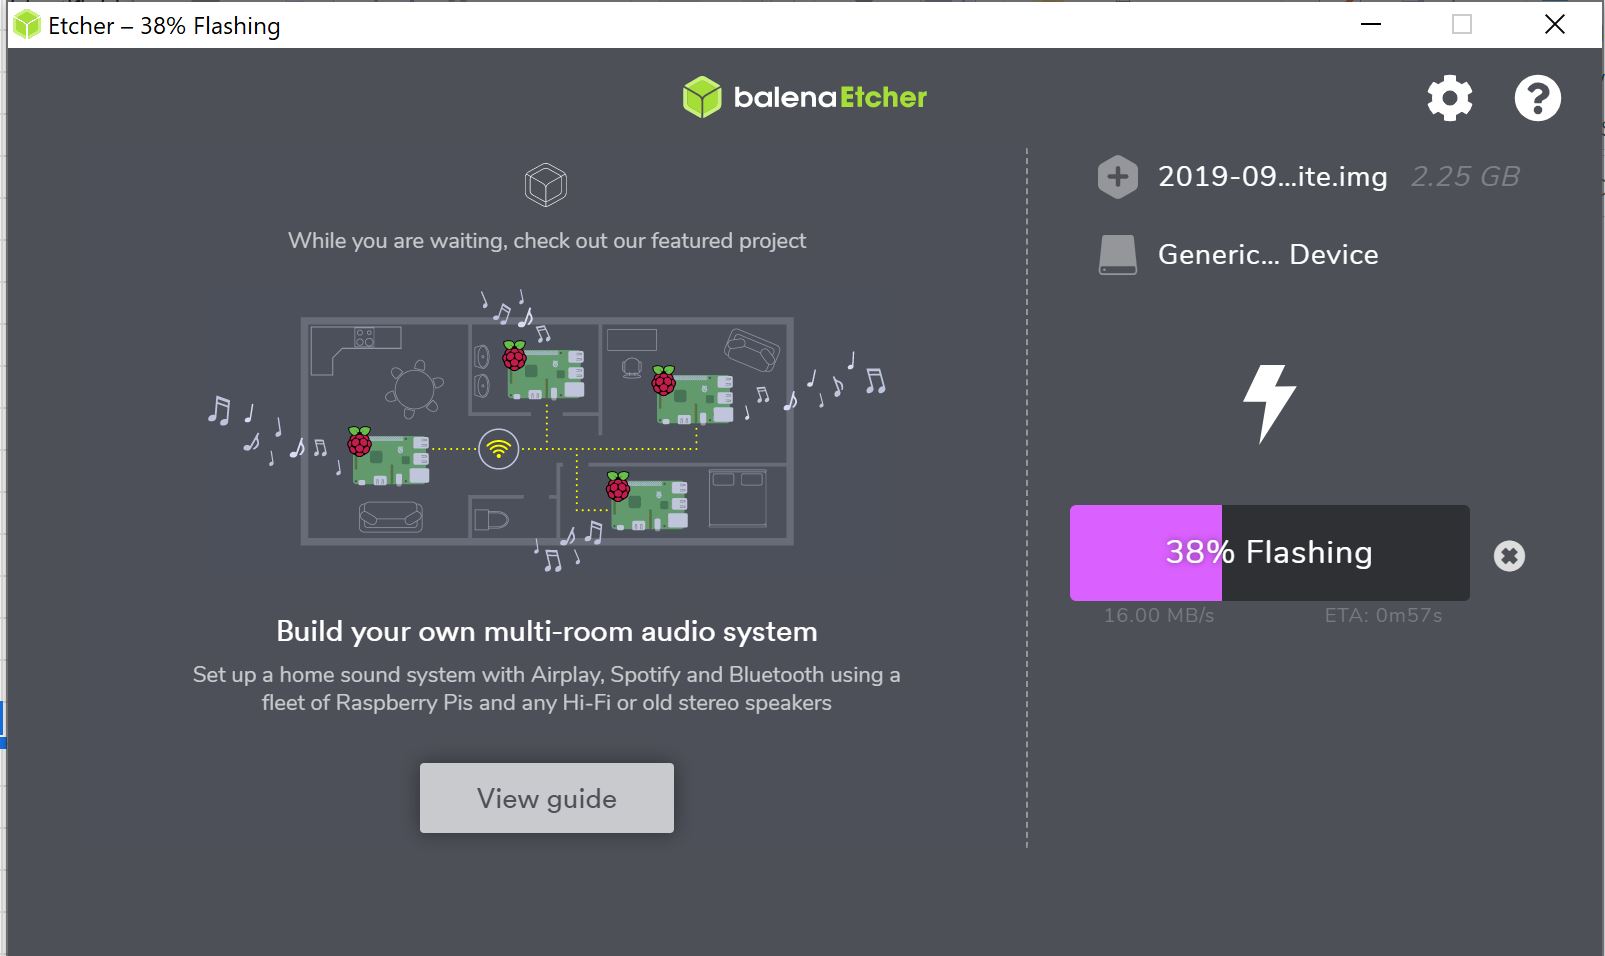
- Done!

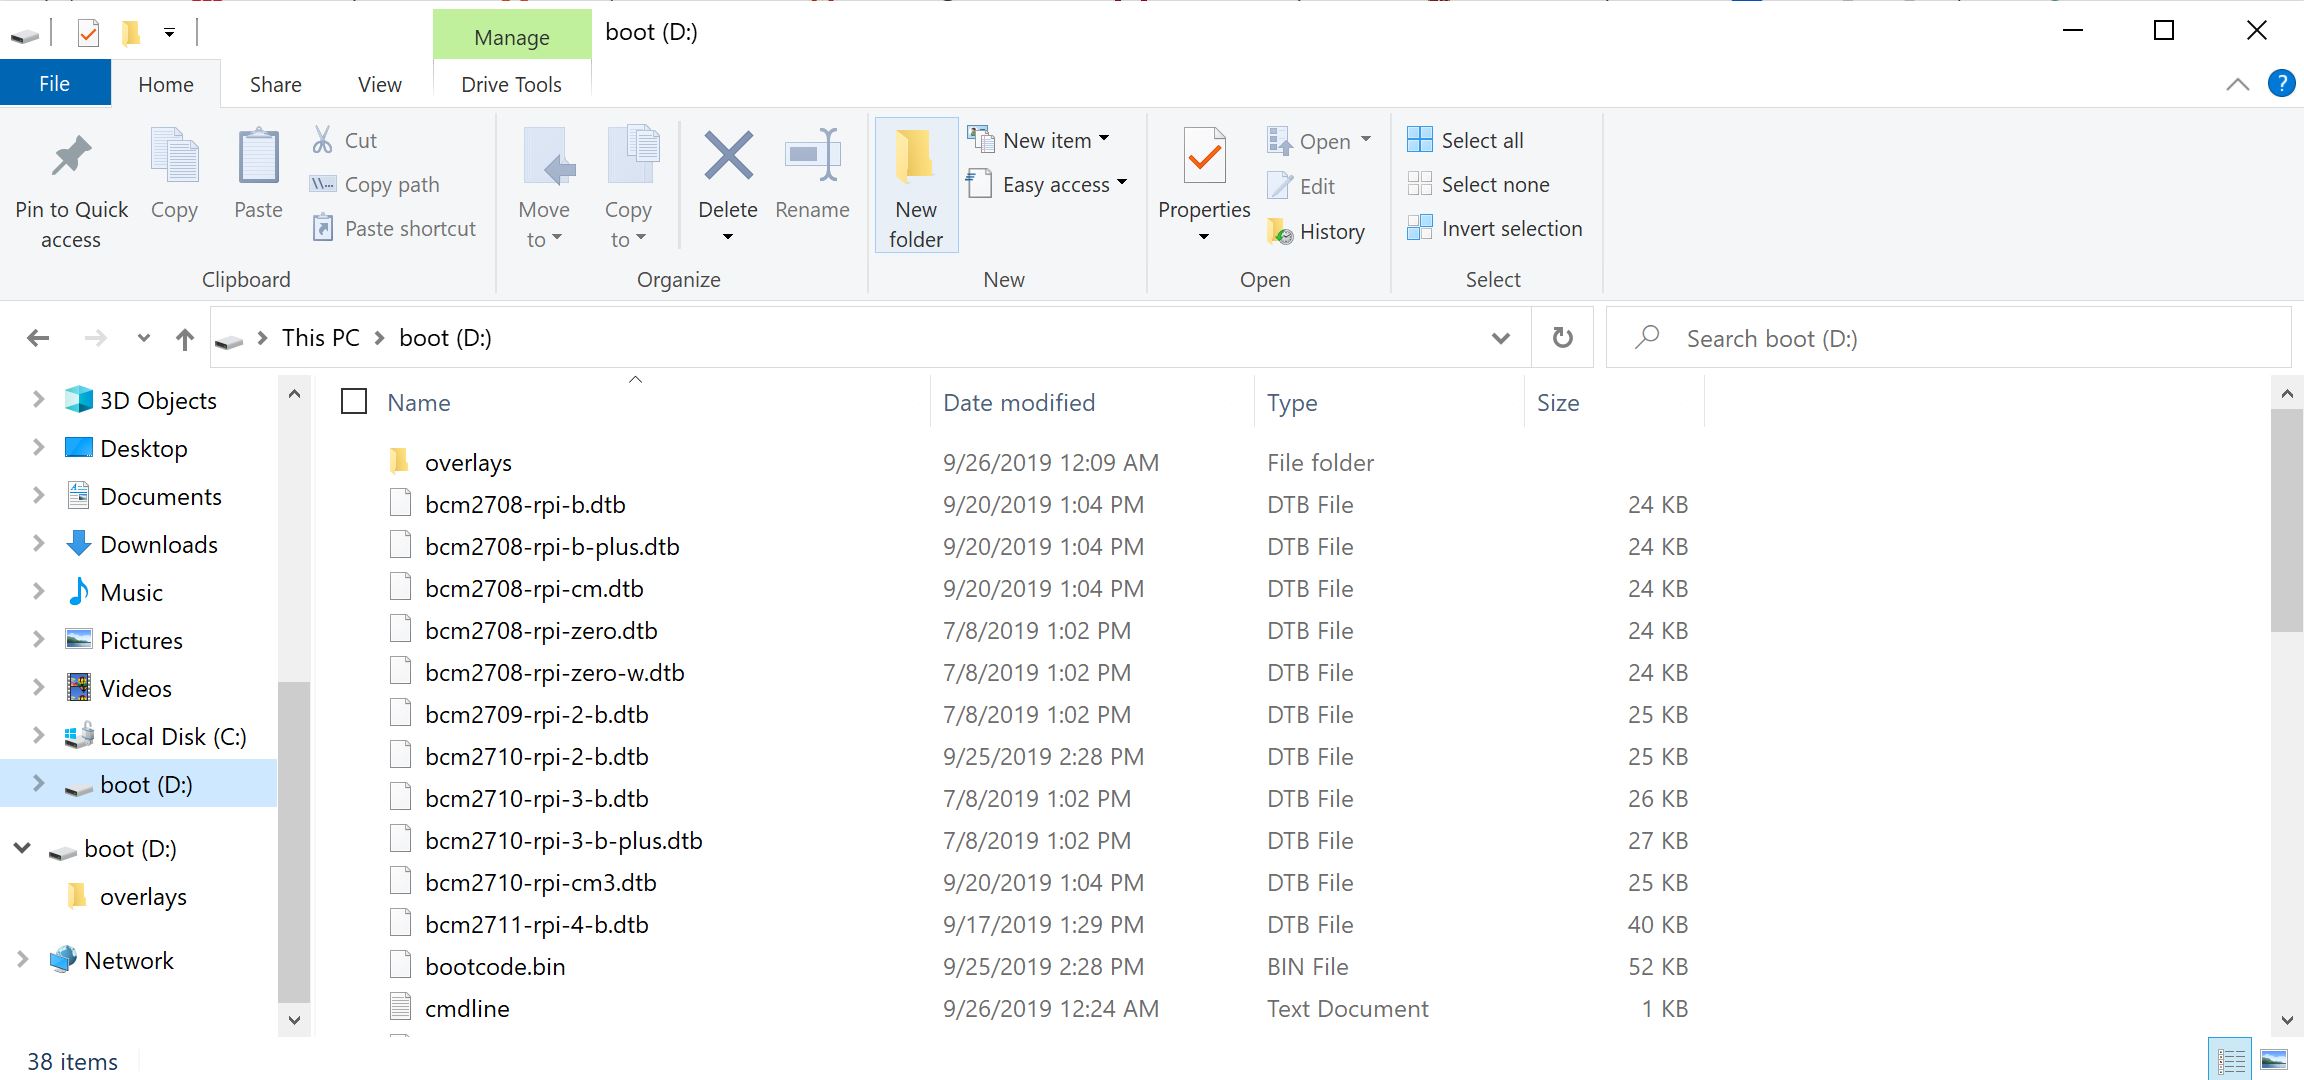
4. Open up the SD card file system.
Sometimes it takes some time for your computer to read the SD card and show the boot folder. Try removing the SD card and putting it back in, if the problem persists.
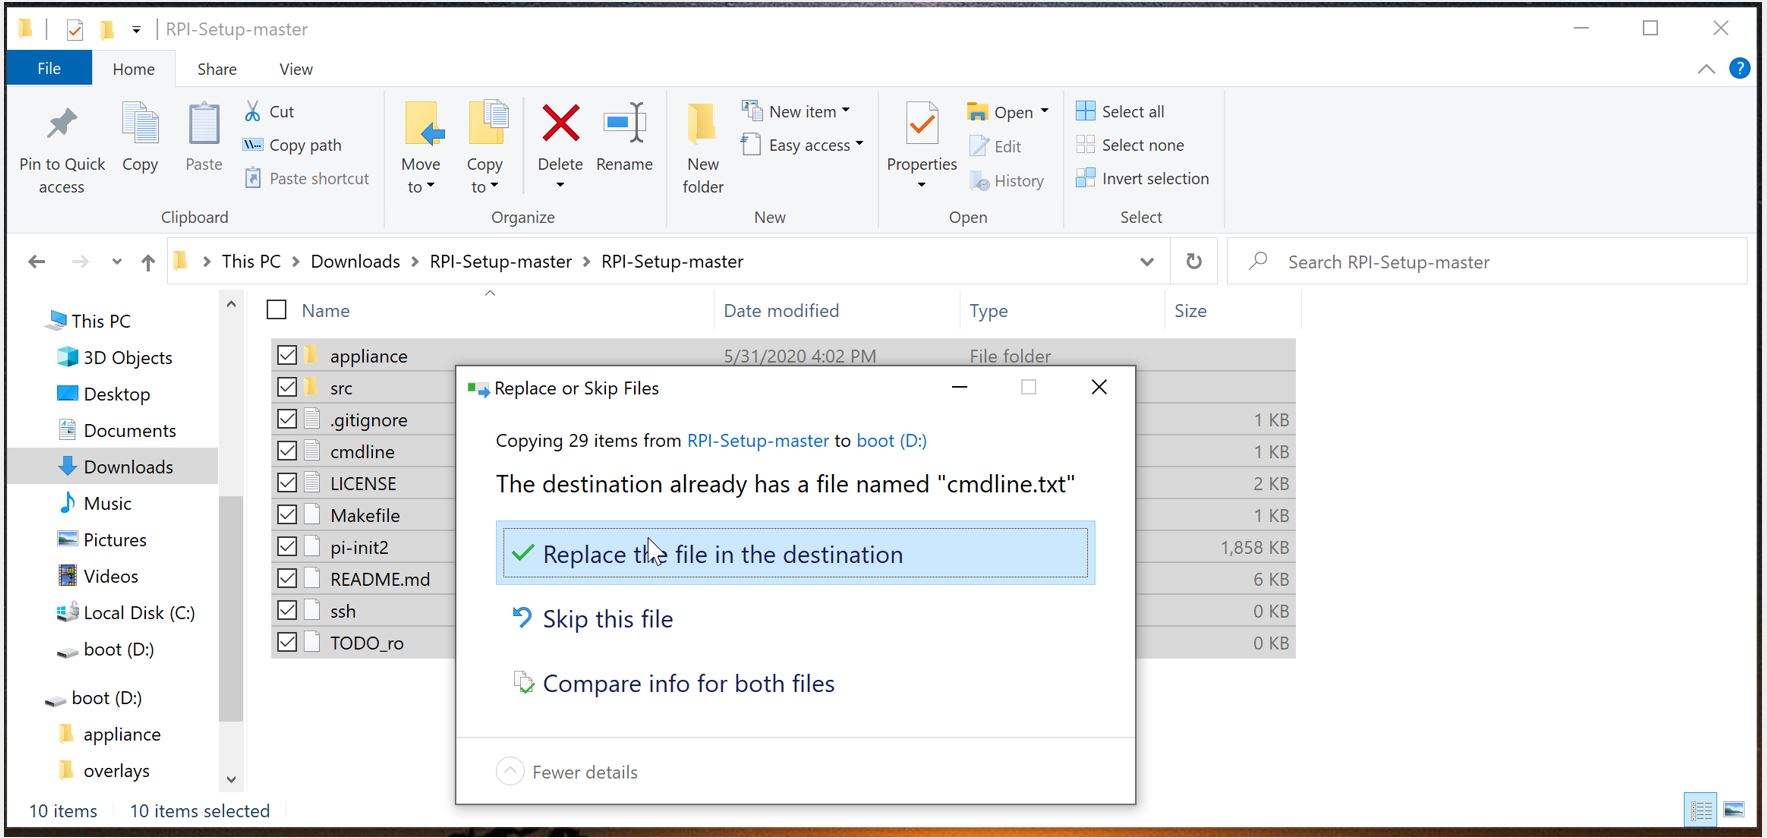
6. Move all the files in the downloaded repository into the SD card.
- Replace any files that conflict so the repository’s version overwrites the original version. You can now delete the zip file and the now empty folder.
Enabling Basic Functionality
1. Turn on your Raspberry Pi.
Remove SD card from computer and put it into your Raspberry Pi. Connect power to the Pi as well.
If your Pi does not boot, please try going back to step 3 “Use etcher to flash the card” and use this version of Rasbian instead: https://downloads.raspberrypi.org/raspbian_lite/images/raspbian_lite-2020-02-14/2020-02-13-raspbian-buster-lite.zip
2. Configure your computer to SSH into the robot
- To use ethernet for set up (recommended), connect the ethernet cable to your computer and the raspberry pi.
- Go to your network settings for the interface you wish to use (ethernet/wifi)
- Change your Configure IPv4: Manually
- Change your IP Address to something in range 10.0.0.X (If you are a part of Stanford Student Robotics pick something that doesn’t colide with other systems from this document )
- Change your Subnet Mask: 255.255.255.0
- Leave the Router blank
- After disconnecting from the robot network remember to return those settings to what they orignially were, otherwise your internet on that interface won’t work
3. Enter read-write mode
Run rw in the robot shell.
Confirm that the terminal prompt ends with (rw) instead of (ro).

4. Get internet access
There are two methods for getting internet access: using the raspi-config tool on the Pi or changing the wpa_supplicant file on the SD card before inserting it into the Pi. If you’re on Stanford campus, please follow the instructions in the next section instead since there are special requirements. If you’re not on Stanford campus, using the raspi-config tool is simpler and recommended for beginners. However, modifying the wpa_supplicant file has the benefit that you can set the proper internet settings without SSHing into the Pi.
- Raspi-config method
Once SSH’d into the Pi, run:
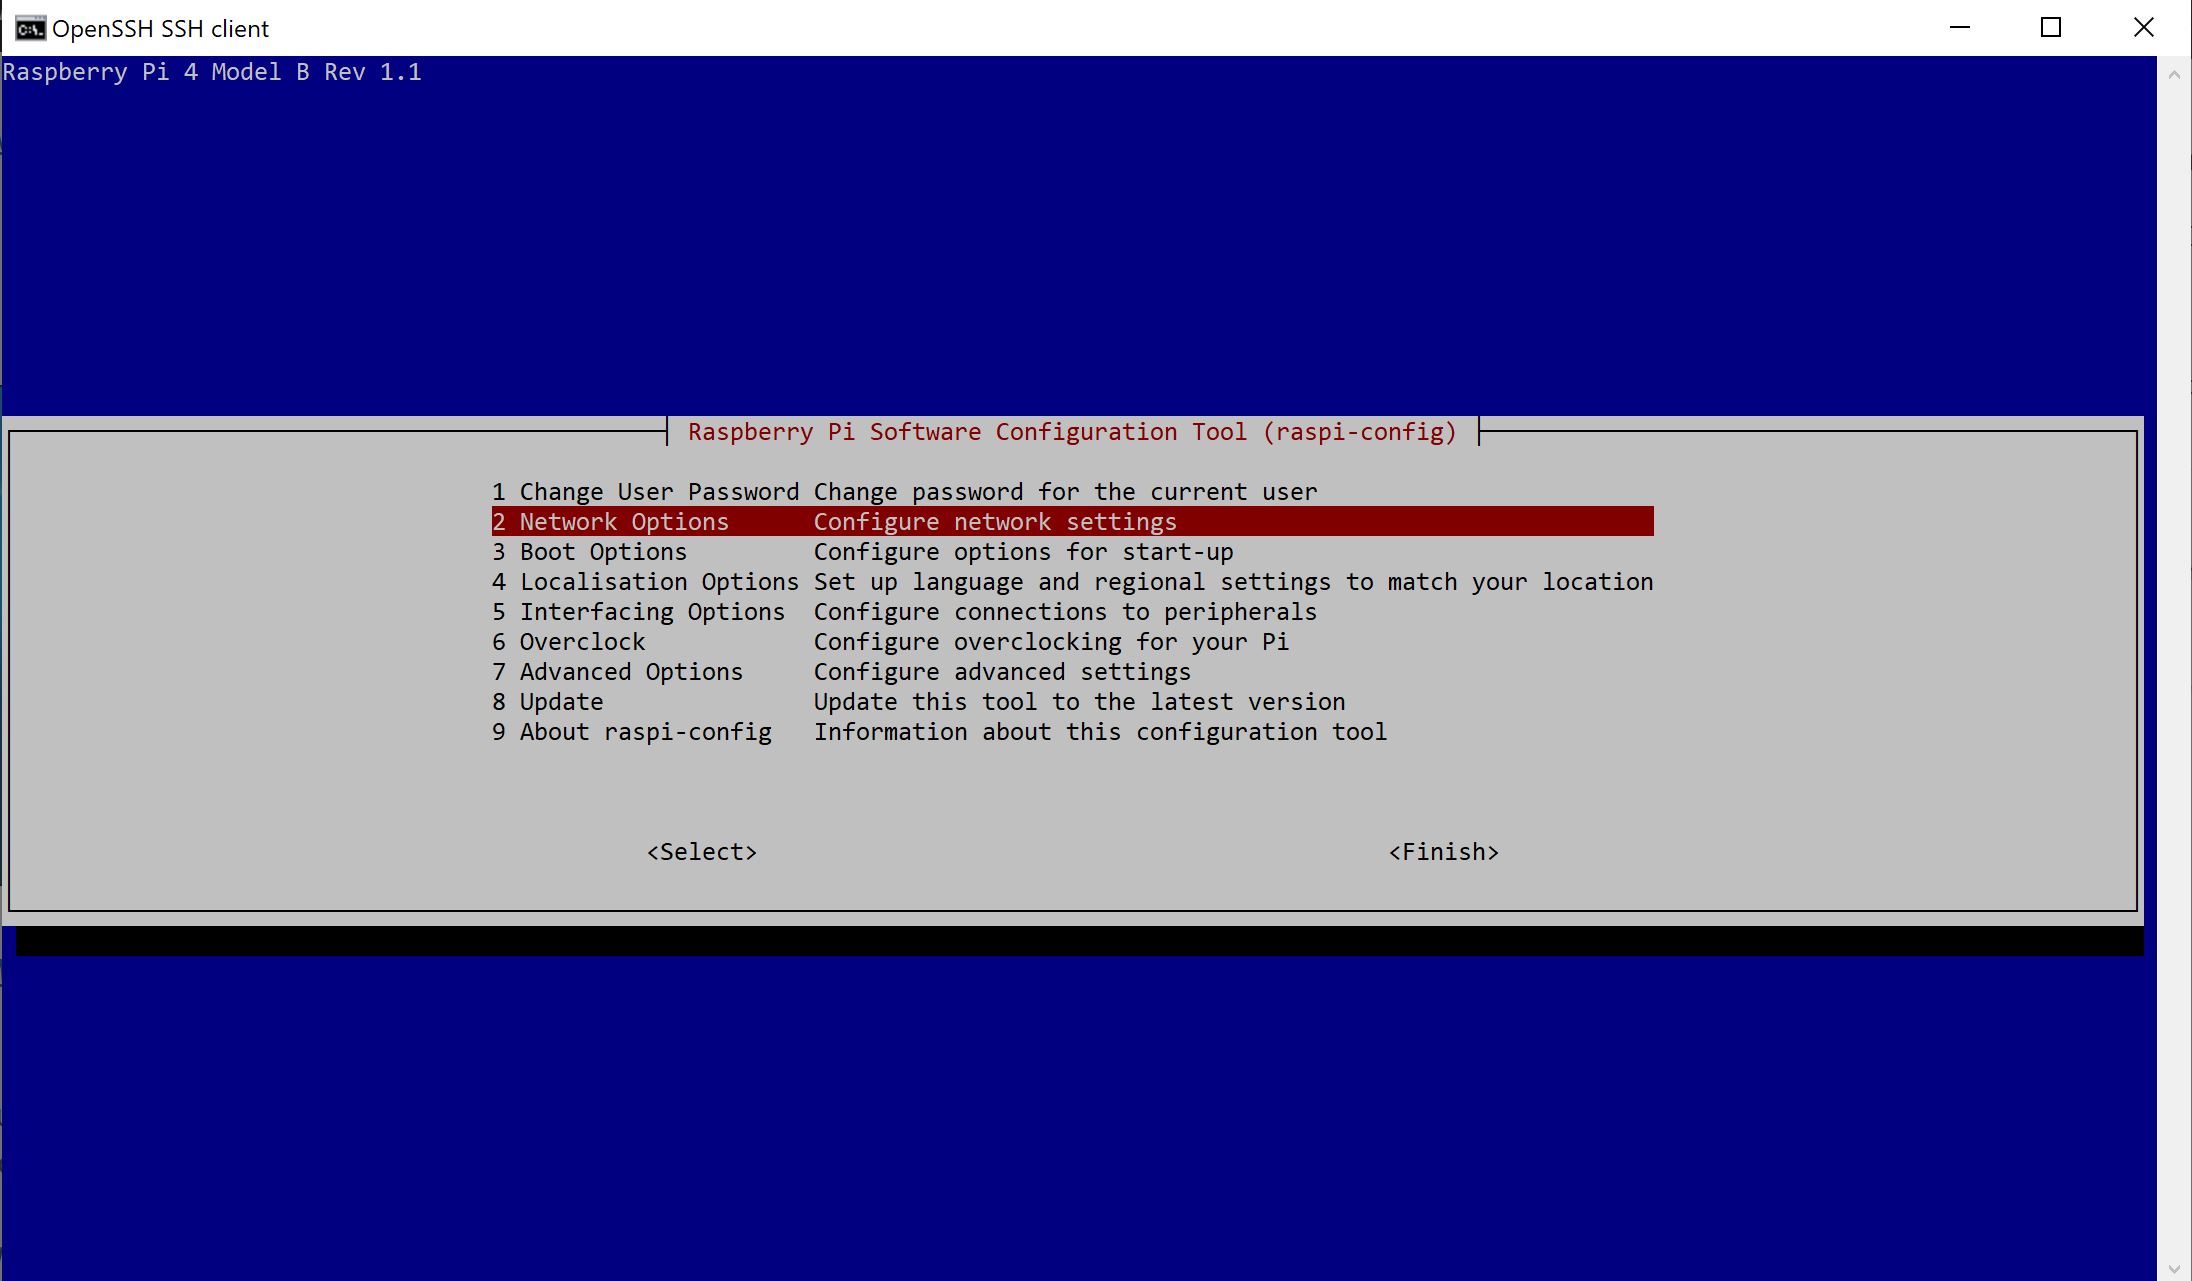
sudo raspi-config
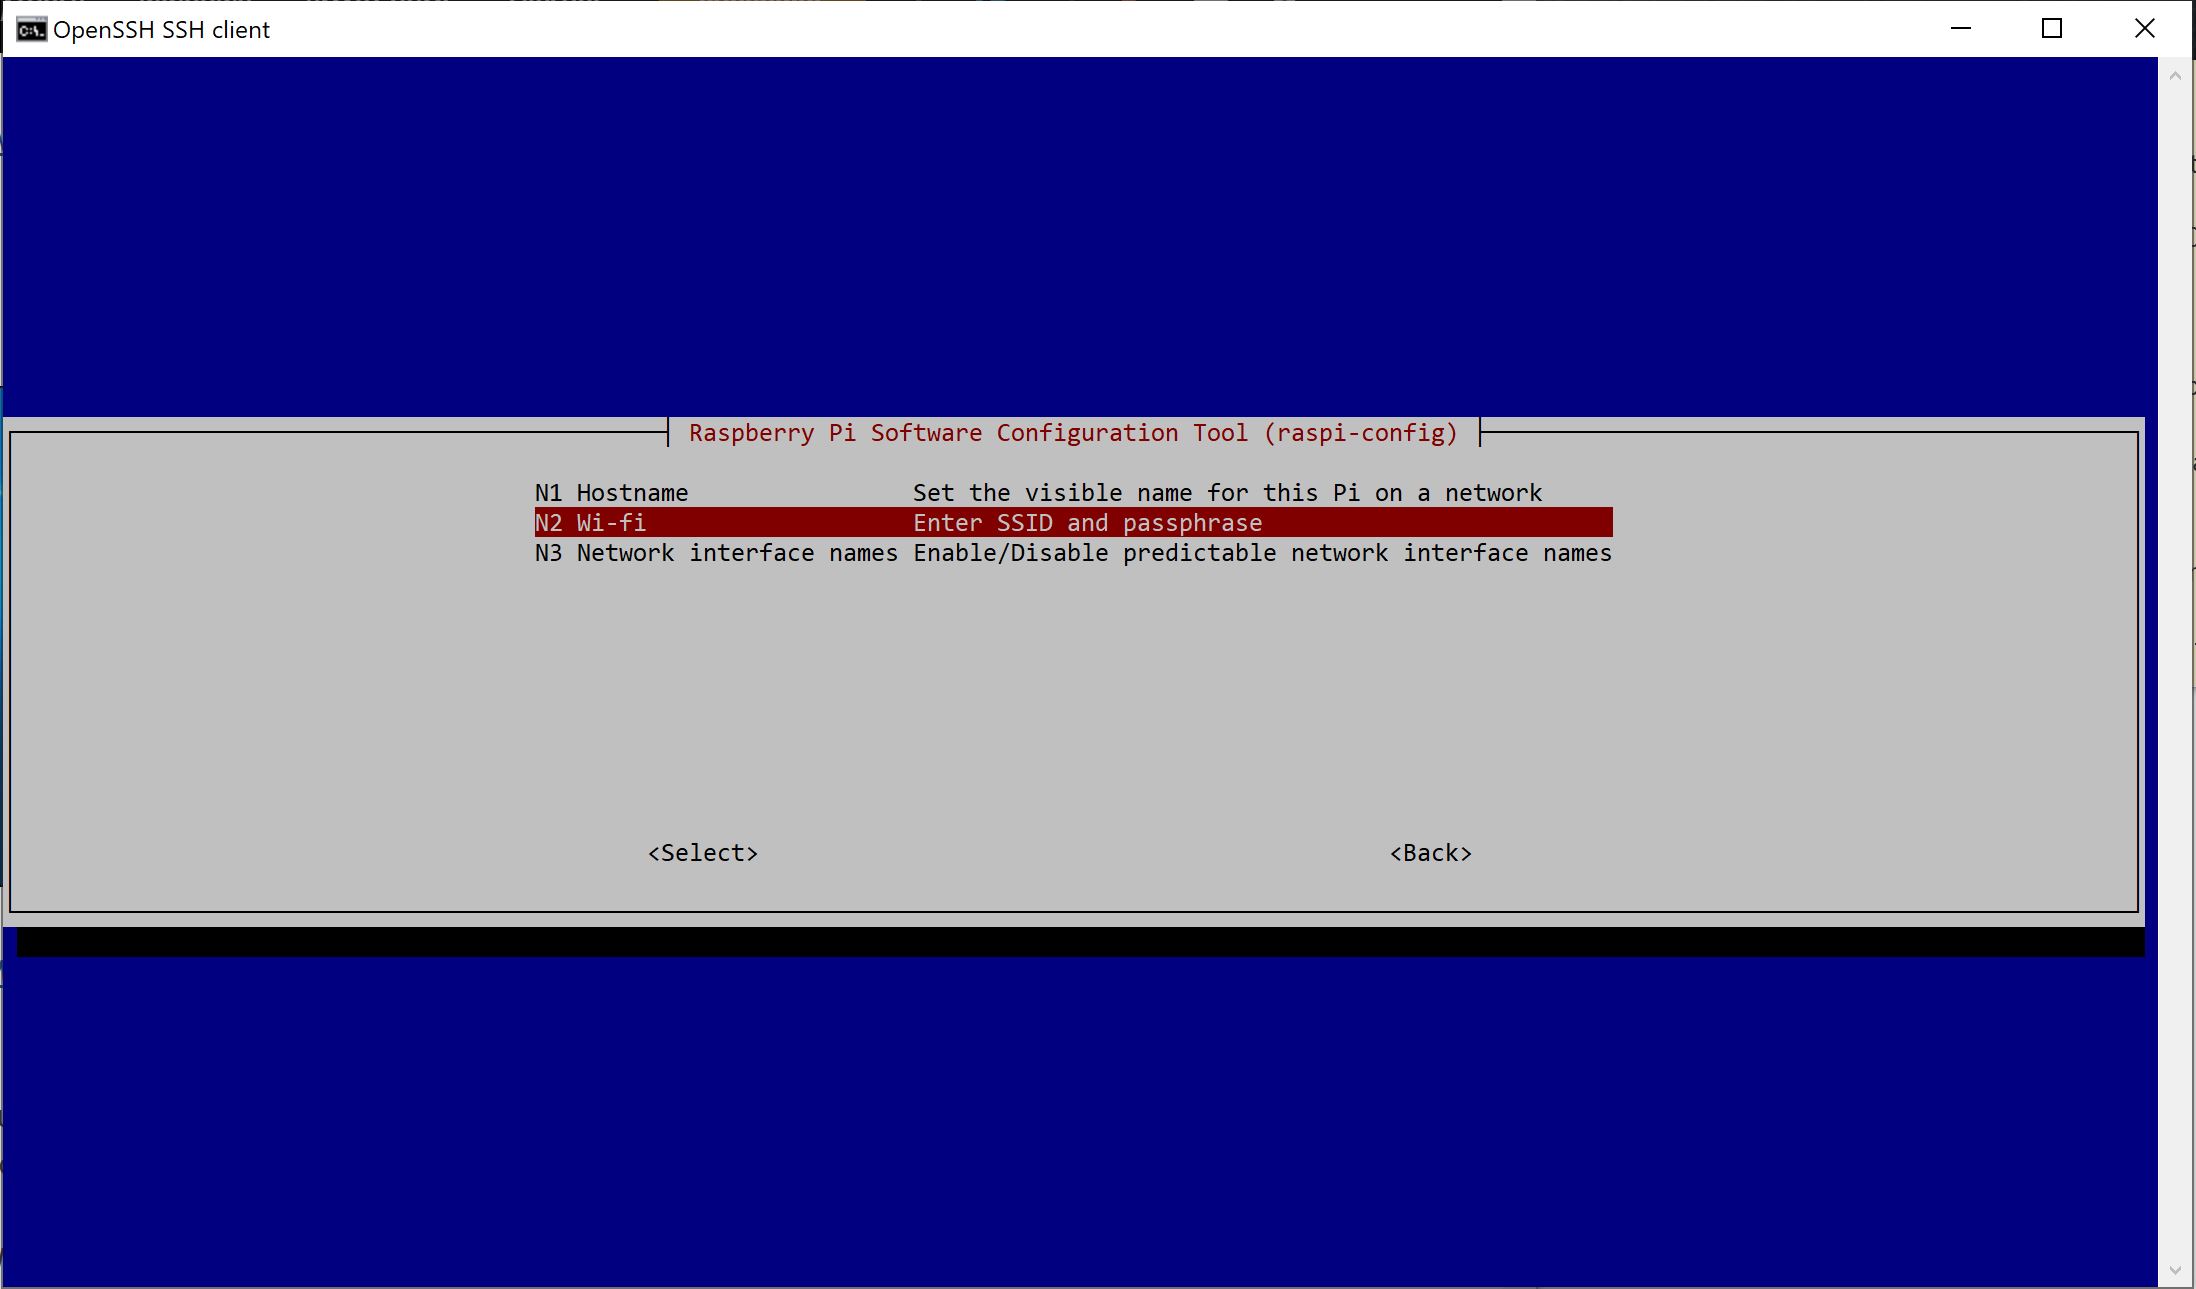
This is the menu that will appear. Go to Network Options, then Wi-Fi and enter your SSID (Wi-Fi name, eg. Netgear, Linksys) and password.
- Wpa_supplicant method
Edit /etc/wpa_supplicant/wpa_supplicant.conf as documented in this link , see “Adding the network details to the Raspberry Pi”. You can also see this link. Thanks to pi-init2 magic that file can be edited before the pi is ever turned on from /boot/appliance/etc/wpa_supplicant/wpa_supplicant.conf
4. [For Stanford Student Students] Get internet access at Stanford
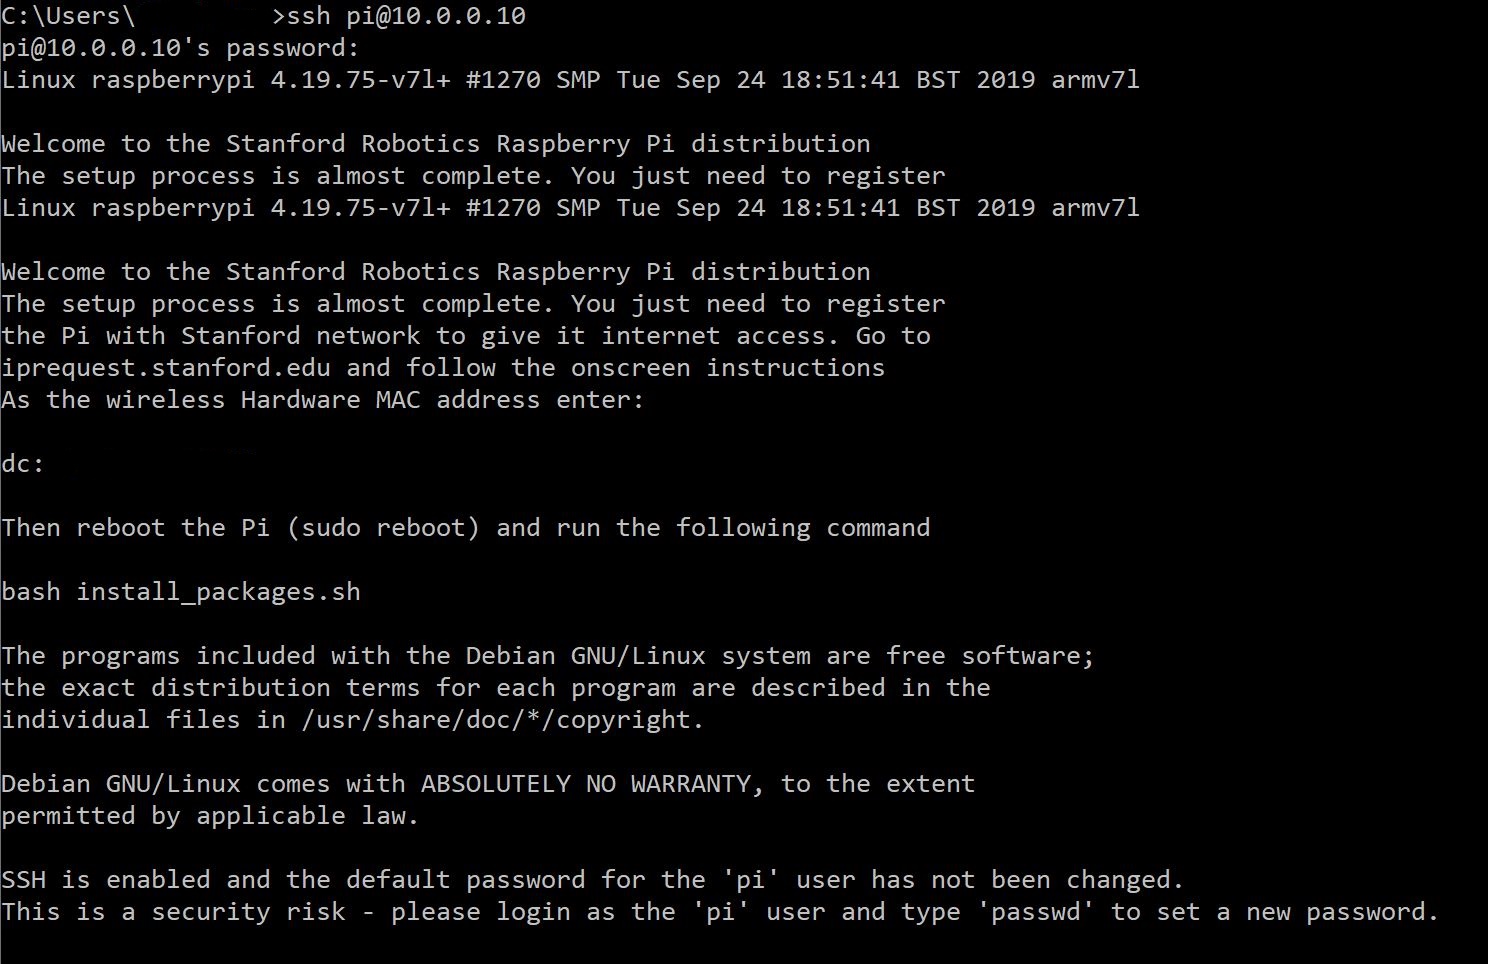
- Plug your Pi in to power (over the onboard micro USB port). Log in to the Pi over SSH. In the welcome message that comes after the login line, look for the Pi’s MAC address, which will appear under the line that says “wireless Hardware MAC address”. Note that address down.
- Use another computer to navigate to iprequest.stanford.edu.
- Log in using your Stanford credentials.
- Follow the on-screen instructions to add another device:
- First page: Device Type: Other, Operating System: Linux, Hardware Address: put Pi’s MAC address
- Second page: Make and model: Other PC, Hardware Addresses Wired: delete what’s there, Hardware Addresses Wireless: put Pi’s MAC address
- Confirm that the Pi is connected to the network:
- Wait for an email (to your Stanford email) that the device has been accepted
- sudo reboot on the Pi
- After it’s done rebooting, type ping www.google.com and make sure you are receiving packets over the network
5. Install prerequisites
- Run
sudo ./install_packages.sh - If the IP is still 10.0.0.10 you will be prompted to change it. The raspberry Pi IP should not be the same as your computer’s IP, 10.0.0.Y.
- If the hostname is still raspberry you will be prompted to change it.
- You will be asked to enter the current time and date. You can skip to the next step if you’d like to automatically set the time and date.
- Run
sudo ./time_sync.shto automatically set the time and date.
What the RPI-Setup repo does
- Enables ssh. Because the password is kept unchanged (raspberry) ssh is only enabled on the ethernet interface. Comment out the ListenAddress lines from /boot/appliance/etc/ssh/sshd_config to enable it on all interfaces.
- Sets the Pi to connect to the robot network (10.0.0.X) over ethernet
- Expands the SD card file system
- Sets the file system up as read-only
- Prepares to connect to Stanford WiFi (see above for details)
- Gives the script to install tools and repos needed for development
Installing the StanfordQuadruped software on the Raspberry Pi
Steps
1. Connect to the Pi over SSH
Check that it has access to the internet. If you’re having trouble SSH-ing into the Pi, please check the instructions for setting the Pi’s ethernet settings linked in the previous step.
ssh pi@10.0.0.Y
Here, “Y” is the IP address you chose for the Pi when running the install_packages.sh script. When prompted for the password, enter the default password “raspberry” or the one you set in the install_packages.sh script.
If you forgot what the Pi’s IP address is, turn off the Pi, take out the SD card and put it in your computer. Then open the sd card folder and go to the folder: boot/appliance/etc/network/. Open the file called “interfaces” in a text editor. On line 19 it should show the IP address as “address 10.0.0.x”.
2. Test for the internet connection.
ping www.google.com
This is what the output should look like:

If that doesn’t work, do:
ifconfig
and check the wlan0 portion to check if you have an IP address and other debugging info.
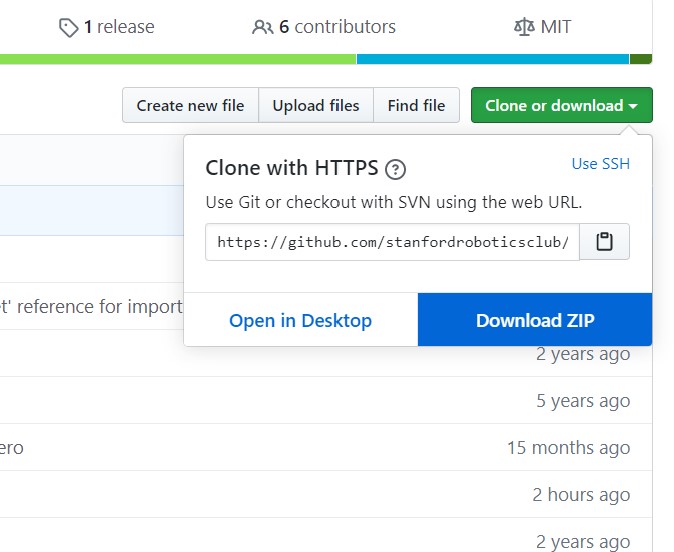
3. Clone this repo (on the Pi)
git clone https://github.com/stanfordroboticsclub/StanfordQuadruped.git
4. Install requirements (on the Pi)
cd StanfordQuadruped
sudo bash install.sh
5. Power-cycle the robot
Unplug the battery, wait about 30 seconds, and then plug it back in.
6. Verify everything is working
If you just powered on the Pi, wait about 30 seconds until the green light stops blinking.
SSH into the robot
- Run
ssh pi@10.0.0.xx (where xx is the IP address you chose for the robot)
- Run
Check the status for the joystick service
Run
sudo systemctl status joystickIf you haven’t yet connected the PS4 controller, it should say something like
pi@pupper(rw):~/StanfordQuadruped$ sudo systemctl status joystick
● joystick.service - Pupper Joystick service
Loaded: loaded (/home/pi/PupperCommand/joystick.service; enabled; vendor preset: enabled)
Active: active (running) since Sun 2020-03-01 06:57:20 GMT; 1s ago
Main PID: 5692 (python3)
    Tasks: 3 (limit: 4035)
Memory: 7.1M
CGroup: /system.slice/joystick.service
        ├─5692 /usr/bin/python3 /home/pi/PupperCommand/joystick.py
        └─5708 hcitool scan --flush

Mar 01 06:57:20 pupper systemd[1]: Started Pupper Joystick service.
Mar 01 06:57:21 pupper python3[5692]: [info][controller 1] Created devices /dev/input/js0 (joystick) /dev/input/event0 (evdev)
Mar 01 06:57:21 pupper python3[5692]: [info][bluetooth] Scanning for devices
Connect the PS4 controller to the Pi by putting it pairing mode.
- To put it into pairing mode, hold the share button and circular Playstation button at the same time until it starts making quick double flashes.
- If it starts making slow single flashes, hold the Playstation button down until it stops blinking and try again.
Once the controller is connected, check the status again
Run
sudo systemctl status joystickIt should now look something like:
pi@pupper(rw):~/StanfordQuadruped$ sudo systemctl status joystick
● joystick.service - Pupper Joystick service
Loaded: loaded (/home/pi/PupperCommand/joystick.service; enabled; vendor preset: enabled)
Active: active (running) since Sun 2020-03-01 06:57:20 GMT; 55s ago
Main PID: 5692 (python3)
    Tasks: 2 (limit: 4035)
Memory: 7.3M
CGroup: /system.slice/joystick.service
        └─5692 /usr/bin/python3 /home/pi/PupperCommand/joystick.py

Mar 01 06:57:20 pupper systemd[1]: Started Pupper Joystick service.
Mar 01 06:57:21 pupper python3[5692]: [info][controller 1] Created devices /dev/input/js0 (joystick) /dev/input/event0 (evdev)
Mar 01 06:57:21 pupper python3[5692]: [info][bluetooth] Scanning for devices
Mar 01 06:58:12 pupper python3[5692]: [info][bluetooth] Found device A0:AB:51:33:B5:A0
Mar 01 06:58:13 pupper python3[5692]: [info][controller 1] Connected to Bluetooth Controller (A0:AB:51:33:B5:A0)
Mar 01 06:58:14 pupper python3[5692]: running
Mar 01 06:58:14 pupper python3[5692]: [info][controller 1] Battery: 50%
If the pi can’t find the joystick after a minute or two, it’s possible that the pi’s bluetooth controller was never turned on. Run
sudo hciconfig hci0 upto turn the radio on. Then restart the pi.
Check the status of the robot service
- Run
sudo systemctl status robot - The output varies depending on the order of you running various programs, but just check that it doesn’t have any red text saying that it failed.
- If it did fail, usually this fixes it:
sudo systemctl restart robot
- Run